
How do I create an asset?
Quick answer
Section titled “Quick answer”Open the Assets module, click “Add Asset”, choose the type, give it a name, and click “Create” in the bottom right. Only type and name are required — all other fields (manufacturer, serial number, location, purchase data, …) are optional and can be filled in later at any time. Once created, the asset immediately appears in the list; clicking it opens the detail view with the QR code.
Prerequisites
Section titled “Prerequisites”The Assets module is part of the core product and available on all plans. The only thing to watch out for is your license’s asset limit (e.g. 250 on the Basic plan) — once it’s reached, Notory rejects the creation of new assets.
Instructions
Section titled “Instructions”-
Open the “Assets” module. Select Assets in the left-hand navigation. You’ll see the list of all existing assets. The “Add Asset” button is in the top right.
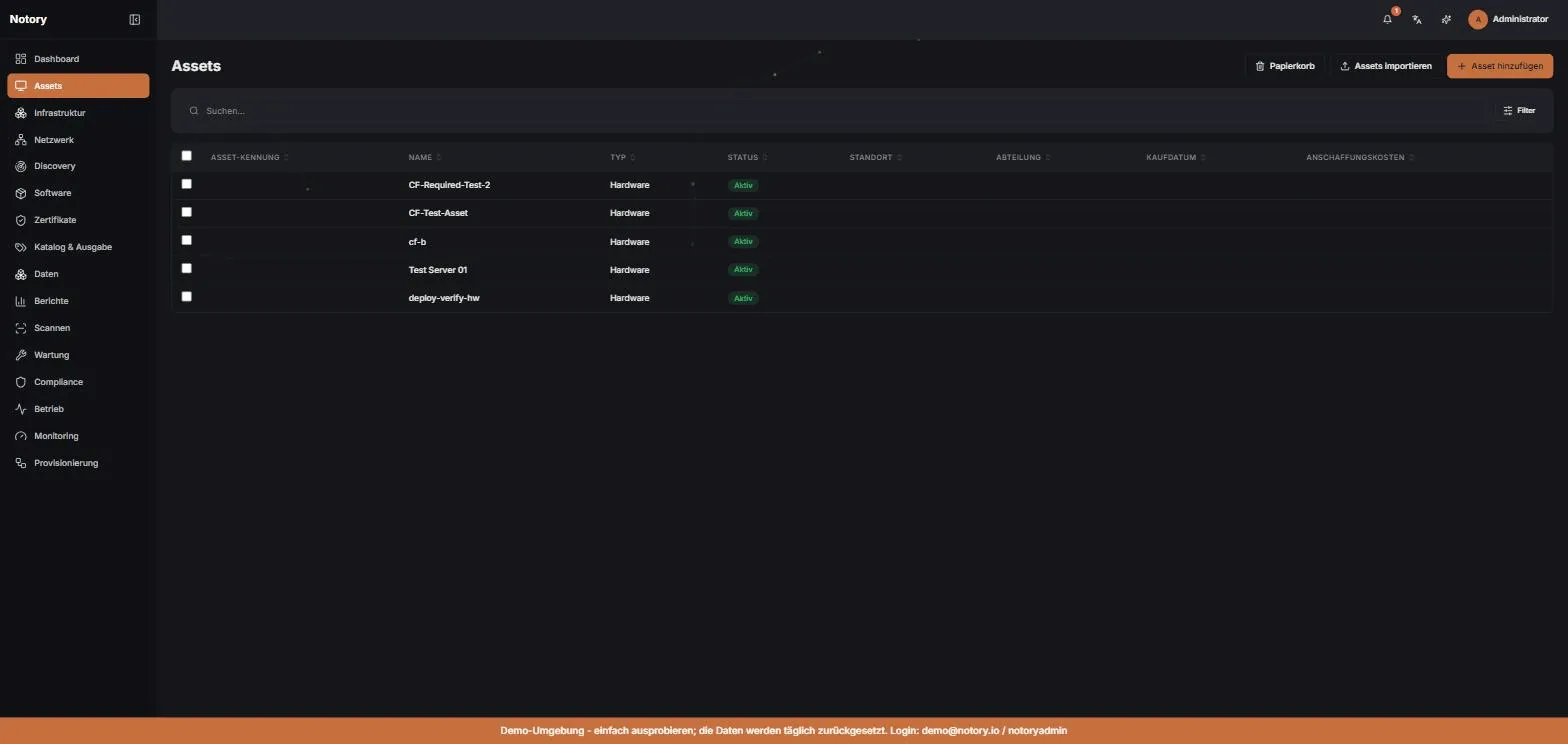
The asset overview with the 'Add Asset' button. -
Fill out the form. The “Add Asset” form opens. Fill in at least the required fields:
- Type — e.g.
Hardware,Software,Network,Certificate,License, orPeripheral. - Name — the asset’s designation (e.g. “ThinkPad T14 – Sales”).
Optional but recommended: Manufacturer, Model, Serial Number, Status (default:
Active), Location, Department, Assigned To, Purchase Date, Purchase Cost, and Warranty Expiry. The Financials & Lifecycle section additionally captures the depreciation method and useful life.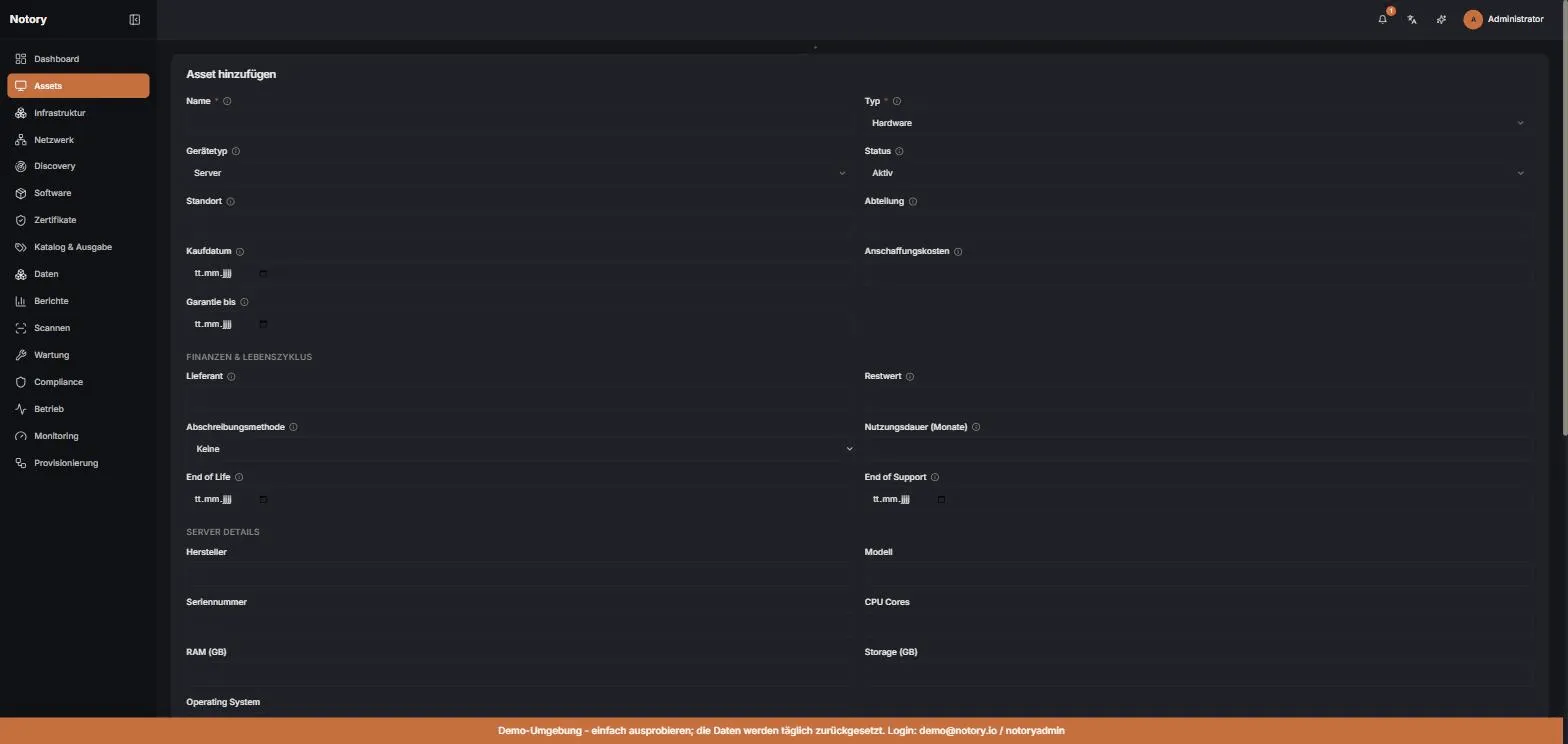
The empty 'Add Asset' form. Only Type and Name are required. - Type — e.g.
-
Create it. Click “Create” in the bottom right. The asset is created and you return to the asset list — the new entry appears at the top. Clicking the row opens the detail view: there you’ll find the QR code (in the QR Code section → “Download QR Code”), the History, Risk, and Notes tabs, and the Issue / return panel for issuing the device directly to an employee.
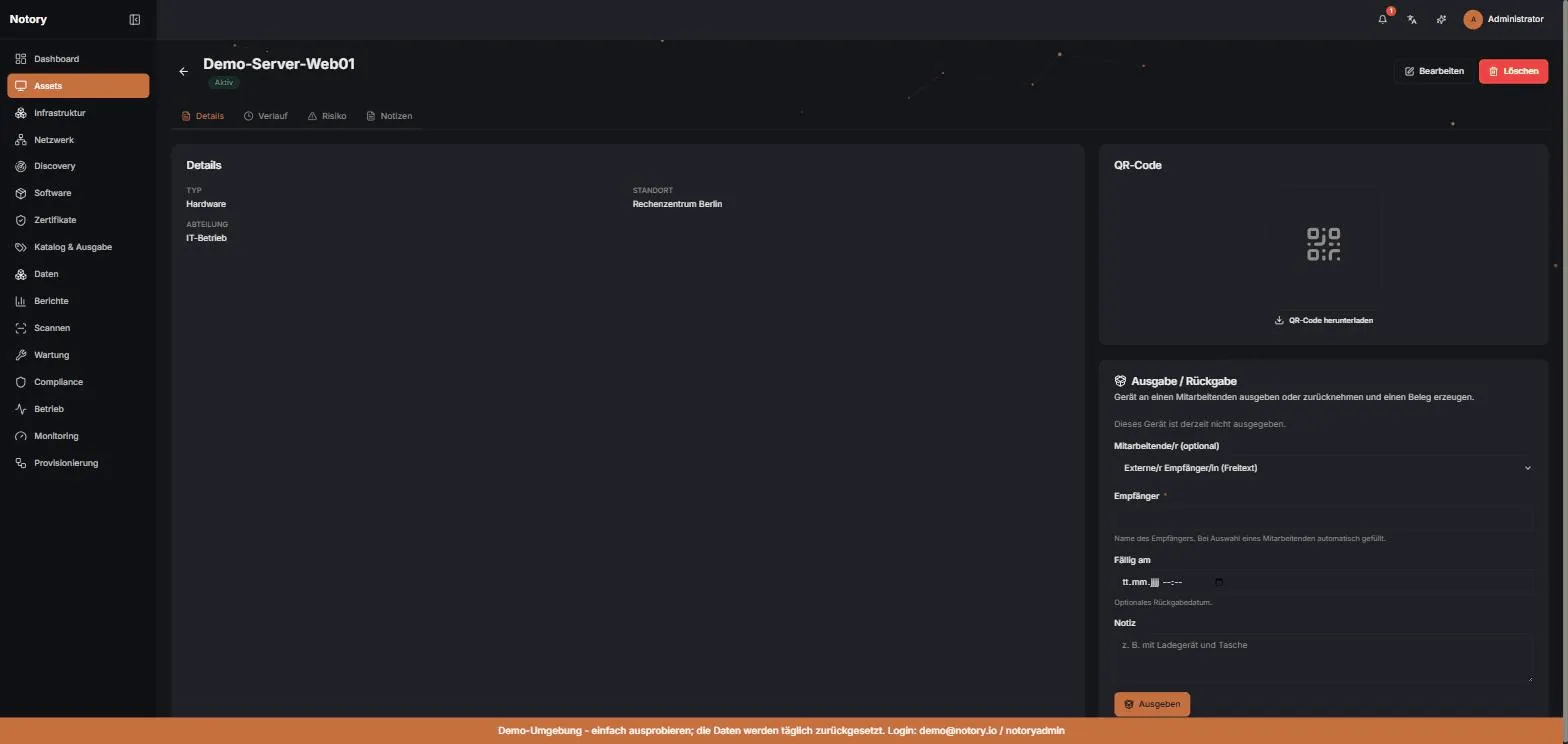
The detail view of the new asset, including QR code and Issue / return.
The same action via the REST API: a POST to /api/v1/assets with a bearer
token (scope write). Only asset_type and name are required.
curl -X POST https://demo.notory.io/api/v1/assets \ -H "Authorization: Bearer inv_dein_token" \ -H "Content-Type: application/json" \ -d '{ "asset_type": "hardware", "name": "ThinkPad T14 – Vertrieb", "manufacturer": "Lenovo", "model": "T14 Gen 4", "serial_number": "PF-3X9K2L", "status": "active", "location": "Büro München / Raum 2.14", "department": "Vertrieb", "purchase_date": "2026-05-02", "purchase_cost": 1249.00, "warranty_expiry": "2029-05-02", "tags": ["notebook", "vertrieb"] }'On success, the API responds with HTTP 201 Created and the newly created asset:
{ "id": "a2f1c9e4-7b3d-4a11-9c2e-8f6b1d0a7e55", "tenant_id": "3d9b0c12-4e5a-4f88-b1c7-2a9e6d4f0011", "asset_type": "hardware", "name": "ThinkPad T14 – Vertrieb", "serial_number": "PF-3X9K2L", "manufacturer": "Lenovo", "model": "T14 Gen 4", "status": "active", "location": "Büro München / Raum 2.14", "department": "Vertrieb", "purchase_date": "2026-05-02", "purchase_cost": 1249.0, "warranty_expiry": "2029-05-02", "depreciation_method": "none", "data_classification": "none", "tags": ["notebook", "vertrieb"], "qr_code_url": "/api/v1/assets/a2f1c9e4-7b3d-4a11-9c2e-8f6b1d0a7e55/qr", "current_book_value": null, "created_by": "b7c3…", "created_at": "2026-07-08T09:14:22Z", "updated_at": "2026-07-08T09:14:22Z"}You can then fetch the matching QR code as a PNG:
curl -H "Authorization: Bearer inv_dein_token" \ https://demo.notory.io/api/v1/assets/a2f1c9e4-7b3d-4a11-9c2e-8f6b1d0a7e55/qr \ --output asset-qr.pngPossible errors: 401 (missing or invalid token), 403 (no write access
or the license’s asset limit has been reached), 422 (validation error —
e.g. an empty name or an unknown asset_type).
What happens behind the scenes?
Section titled “What happens behind the scenes?”Several things happen in the background when you create an asset:
- Tenant assignment: The asset is automatically assigned to your current
tenant (
tenant_id). Other tenants never see it (tenant isolation). - Audit trail: You’re recorded as the creator (
created_by/updated_by), with the timestampcreated_at. The creation is logged. - License check (gating): Before saving, Notory checks the license’s asset
capacity. If your plan’s limit has been reached, the creation is rejected
with
403. - Custom field validation: If you pass custom fields (
custom_fields), they are validated against the custom fields defined for your tenant (Catalog/Flex platform). - Default values: If not specified,
status = active,depreciation_method = none, anddata_classification = noneapply. - QR code: The asset immediately gets a
qr_code_url; the QR image is generated as a PNG on demand at/api/v1/assets/{id}/qr. - Webhook event: An
asset.createdevent is fired (best-effort, after the response). Subscribers can react automatically — see Webhooks (Elite+).
Related topics
Section titled “Related topics”- Assets — Overview
- Import & Export — create many assets at once via CSV/JSON
- Scan QR Codes
- API Getting Started — authentication, base URL, error codes
- Users & Roles — who can create assets?